Elderfield Mystery Locations - All 22 Mysteries and Roll Outcomes
All 22 Elderfield mystery locations across Town, Sewers, Mall, Old Woods and Catacombs, with every documented die-roll outcome and first-time-only reward.
FAQ
How many mysteries are in Welcome to Elderfield?
Which mysteries pay unique items?
Do the Catacombs mysteries need tools to reach?
The mechanics guide explains how mysteries work — the Luck-driven die, the hidden 0 and 7, the bath reset. This page is the atlas: every mystery the community wiki documents, region by region, with the roll outcomes each table actually records. Where a tier shows “?” on the wiki, it stays “not documented” here — no invented results.
Where are the Town and Sewers mysteries?
One apiece, and both reset with every bath.
| Mystery | Location | Roll outcomes |
|---|---|---|
| Ancient Coin | Dave’s House | 6: 50g (first time) + restores 15 HP 5: 25g (first time) + 10 HP + blessing + curse 3–4: 10 HP + blessing + curse 1–2: lose 5 HP |
| Ritual Candles | Parks & Recreation Office (Sewers) | 7: Bloody Cleaver (first time) + 3 blessings 6: Treasure Map 4 (first time) + 2 blessings 4–5: Leather Chaps (first time) + blessing + 2 curses 2–3: blessing + 2 curses 1: 3 curses |
The Ancient Coin’s table is the system’s cleanest teaching example — each band trades between gold, healing and curse risk with no unique item at stake. The Ritual Candles are the opposite: the only Sewers mystery, and one of just three documented tables with a distinct hidden-7 result.
Where are the Mall mysteries?
Five tables inside the Mall, two of them in the hallway.
| Mystery | Location | Roll outcomes |
|---|---|---|
| ATM | Hallway | 5–6: 50g (first time) + blessing 3–4: 35g (first time) + blessing 1–2: curse |
| Mall Tree | Hallway | 7: Ring of the One Point (first time) + 3 blessings 6: Flask of the Gods (MP) (first time) + not documented 4–5: Tattered Hood (first time) + not documented 2–3: blessing + curse 1: max Defense permanently −1 (one-time) |
| Dark Counter | Sports Planet | 5–6: Block of Rock (first time) + 2 blessings 3–4: attacked by a random Mall encounter 1–2: 2 curses + attacked |
| Arcade Game | Empty Store | 7: Ancient Effigy (first time); 3 blessings after 6: 2 blessings + Sturdy Boots 4–5: 2 blessings 2–3 / 1–2: not documented |
| Fleshy Mass | Jon’s Smoothies | 6: Emerald Ring (first time) + 2 blessings 5: not documented 3–4: 2 blessings + curse 1–2: permanently lose 1 Max HP |
The Mall is the risk-tutoring floor: two of its five tables can permanently reduce stats on low rolls. The Luck engine you build here decides whether those rows are a rounding error or a reason to skip.
Where are the Old Woods mysteries?
Eight mysteries, from the bus stop to the deep campsites.
| Mystery | Location | Roll outcomes |
|---|---|---|
| Well Man | Near the Abandoned Mill | 5–6: Extra Pouch (after the first lucky roll) + Large Coin Box 3–4 / 1–2: not documented |
| Corpse Tree | The Clearing | Riddles, not rolls — the solutions page covers the branches, including the roll that can kill |
| Tent | Clearing campsite | 5–6: Cursed Emerald Ring (after the first lucky roll) + not documented 3–4: 2 Gold Ore 1–2: attacked by the Pretty Flower |
| Fish | Campsite | 5–6: Lost Mariner’s Bauble (after the first lucky roll) + Crystal Flask 3–4: 3 blessings + 2 curses + Giant Fish fight 1–2: 2 curses + Giant Fish fight |
| Trees Man | South of the bus stop | 6: 2 Cleansing Balms + Lesser Offering of Rain 5: Lesser Offering of Rain 3–4 / 1–2: not documented |
| Blood Trees | Clearing, tall trees area | 5–6: Eye of Gatis (after the first lucky roll) + Cleansing Balm 3–4 / 1–2: not documented |
| Hole | Tall trees area | 5–6: Honey ×3 + an unrecorded first-lucky-roll item 3–4 / 1–2: not documented |
| Strange Plant | Tall trees area | 5–6: Dreampearl Seed (after the first lucky roll) + Slimeweeds ×10 3–4: 2 blessings + 2 blessing-or-curse 1–2: not documented |
The woods’ mid bands are the least documented in the game — four of the eight mysteries have no recorded 3–4 or 1–2 outcomes at all. The high bands, by contrast, are where the farm economy’s bottleneck resource originates (Cleansing Balm recurs across two Old Woods tables and two more in the Catacombs) alongside the Dreampearl Seed.
Where are the Catacombs mysteries?
Seven mysteries at the bottom of the mine ladder, most of them behind F3’s bone walls — and two behind doors that need a wire cutter or a small hammer to open.
| Mystery | Location | Roll outcomes |
|---|---|---|
| Hiding Skeleton | Random across F3 | 5–6: Cleansing Balm (limited encounters) then Large Coin Box 3–4: Special Donut 1–2: Small Coin Pouch |
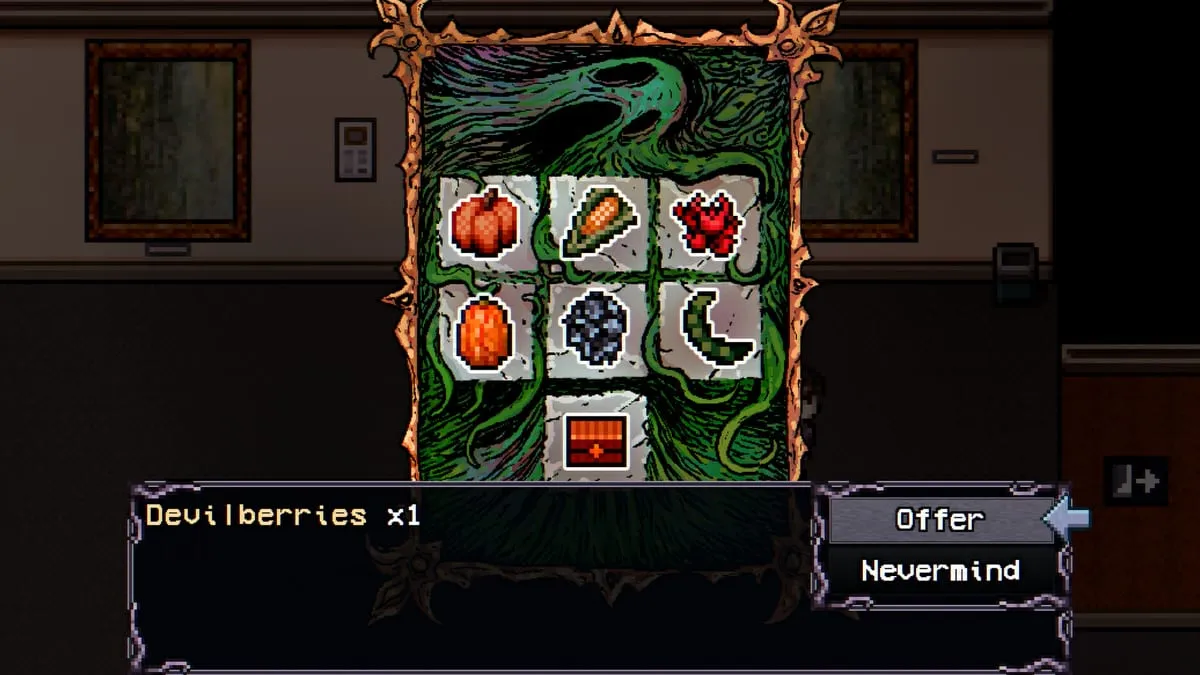
| Skeleton Altar | Door past the first bone wall, right of the F3 entrance | 5–6: first roll not documented, afterwards Death Crystal 3–4: 2 blessings + curse 1–2: 3 curses |
| Pink Tree | Door behind the second bone wall, F3 | 6: first roll Floral Scarecrow blueprints, afterwards Dreampearl Seeds / Extra Pouch / not documented 5 / 3–4: not documented 1–2: 3 blessings |
| Bone Honey | Behind the third bone wall, F3 | 6: Bone Honey ×3 4–5: Bone Honey ×1 2–3 / 1: not documented |
| Skeletal Scarecrow | Left of the Bone Honey tree — wire cutter, then small hammer, on the first door | 5–6: first roll Skeletal Scarecrow blueprints, afterwards 2 Cleansing Balms 3–4: not documented 1–2: 3 curses |
| Spiked Altar | Bottom-left of Catacombs F1 | 4–6: the sacrifice menu (below) 3: not documented 1–2: 5 curses |
| Cat Statues | Small hammer, door left of the shrine entrance — under the laundry ghost | 5–6: first roll Cat Stuffy, afterwards not documented 3–4 / 1–2: not documented |
The Skeleton Altar’s flavor text addresses the prayer “to Kaal, god of the dead” — matching the gods guide’s ledger for Kaal, whose Emissary achievement reads Deep and Dead. The Catacombs keep his paper trail.
The Spiked Altar’s sacrifice menu (roll 4–6, offering is permanent stat loss for gear):
| You offer | You receive |
|---|---|
| 5 Max HP | Shoes of Destruction |
| 10 Max HP | Helm of the One Point |
| 2 Defense | Helm of the One Point |
| 2 Magic Defense | Bow of Destruction |
| 4 Defense | Shoes of Destruction |
| 4 Magic Defense | Helm of the One Point |
| Nothing | not documented |
How do these tables drift from the demo data?
Our mechanics guide carries demo v0.11 numbers verified in-game before launch; the wiki tables above were last re-edited five days after launch. Where they disagree, both are real records of different builds. The drifts big enough to plan around:
- ATM — demo: 5–7 pays 50g with the Greed blessing specifically; the current wiki table bands it 5–6 with a random blessing.
- Strange Plant — demo first-time list included an Emerald Necklace; the current table lists the Dreampearl Seed and Slimeweeds only.
- Fleshy Mass — demo recorded 5 as 5g; the current table leaves tier 5 undocumented.
- Blood Trees — demo split 7 (Balm) from 6 (Eye of Gatis); the current table merges both into 5–6.
- Well Man — demo recorded a separate 5 result (Large Coin Box); the current table merges the band into 5–6.
- Fish — demo split the Bauble (on 5) from the Crystal Flask (on 6–7); the current table lists both under 5–6.
- Ancient Coin — demo reads the payoff band as 6–7; the current table tops out at 6.
- Tent — demo pays the Cursed Emerald Ring on a 6 and spawns the Pretty Flower fight on 0–2; the current table bands the ring to 5–6 and the fight to 1–2.
- Fish fights — demo spawns the Giant Fish on 0–3 only; the current table attaches the fight to both 3–4 and 1–2.
- Blood Trees — demo documents a 3 result (Fear and Doom, blessed with Greed and Skepticism); the current table leaves 3–4 blank.
Until v1.0.0 in-game re-verification lands, treat the wiki bands as the broader record and the demo rows as the in-game-verified floor — where only one side documents a tier, that side wins by default.
Keep Exploring
guides
Elderfield Mysteries Guide - Die Rolls, Luck and Rewards
The mechanics page — Luck, hidden 0 and 7, the bath reset
mysteries
Corpse Tree Riddle Solutions - Old Woods Walkthrough
The one mystery that replaces the die with riddles
guides
Elderfield Mining Guide - Ores, Pickaxe Tiers and Every Mine Floor
The Catacombs floors the bone-wall doors sit on
items
Cleansing Balm - How to Get It and Clear Ghost Tentacles
The reward that recurs across two regions' tables
Was this helpful?
Thanks for the feedback!